Building a deep learning box
July 28, 2017I haven't posted on this blog in a while, so I figured it would be a good idea to do so more! I thought it might interest people to see the kind of deep learning systems we have here. (Also, it'll be nice to refer back to this post next time I have to build a system for the lab).
Here's the steps I used to build the computer. A lot of these are adapted from wikihow which was a useful resource.
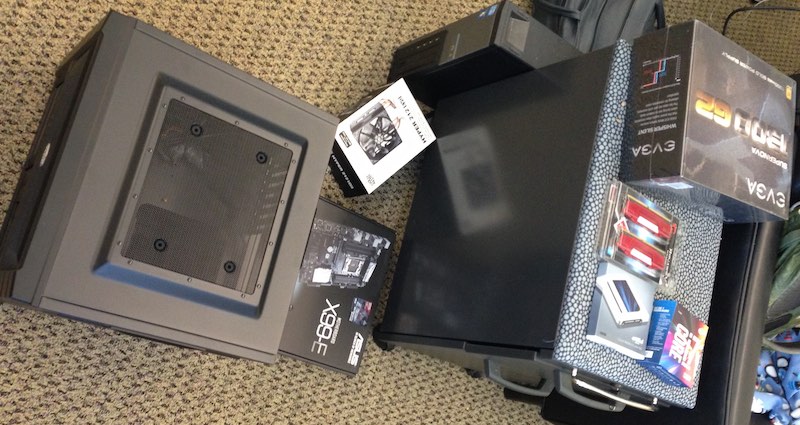
0) Get the parts
Here's a list of the parts that I used. However, I decided to build this for 3 gpus, not 2, since the 3rd GPU was just sitting around otherwise! The only thing I wasn't able to find there was this 1300W power supply. Let me know if you have any thoughts about the part selection.
1) Add the power supply
You're going to first want to unscrew the top of the box:

Next, get out the power supply. We're going to plug in a bunch of cables, like so:
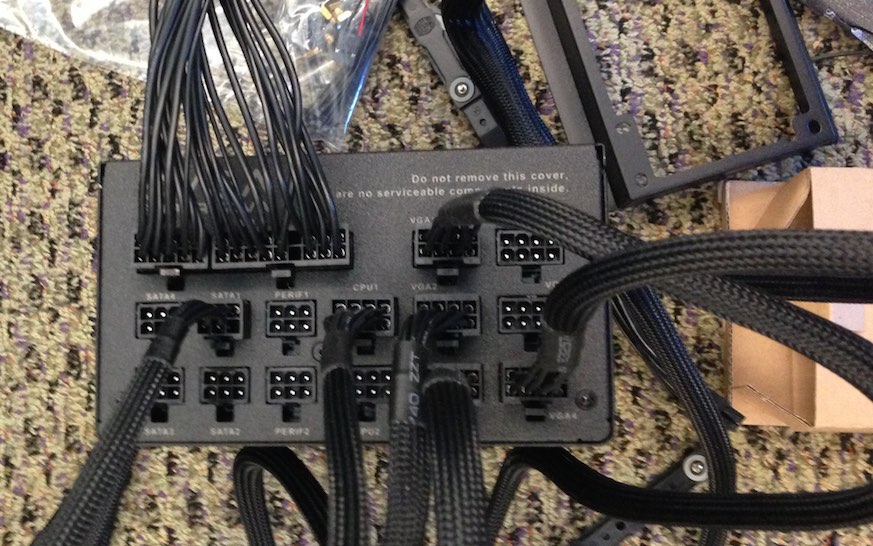
You'll need to attach one cable each for the CPU, motherboard, and SATA. Additionally, you're going to want to add cables for the GPUs. The GPUs that I'm using (Titan X's) require two power inputs: one cable with 8 wires (in a 2x4 configuration) and another with 6 wires (in a 2x3 configuration). Conveniently, the EVGA power supplies have two sets of cables that plug into one slot in the motherboard and that each have two outputs: one 6-pin, another 8-pin. There are other VGA cables that have changeable 6-pin / 8-pin outputs, so you'll need two of those. That adds up to 4 VGA cables in total. Last, you'll want to add a PERIF cable for the fans (not shown in the picture).
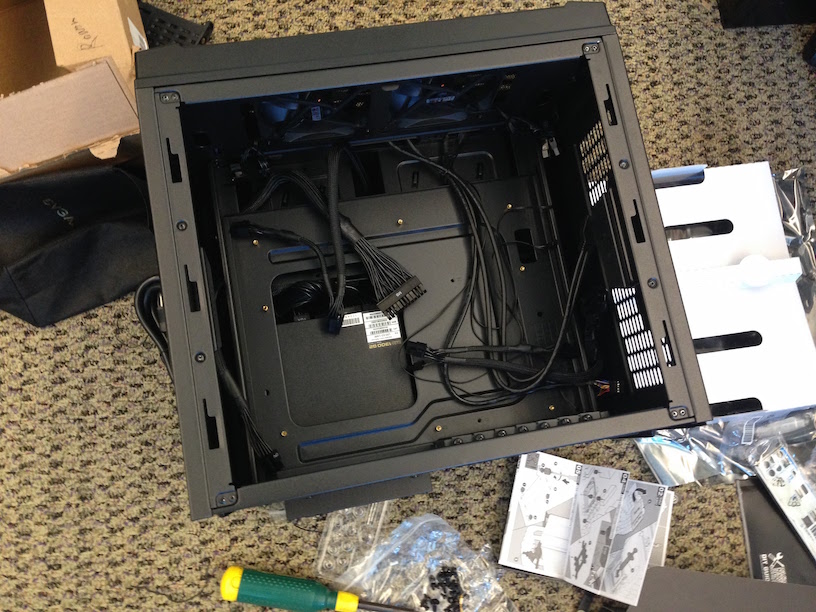
Then, place the power supply in the machine and screw in the back. You'll want to play with the wires so that when you add the horizontal metal sheet back in, they don't get super tangled.
2) Add the motherboard
This is possibly the most challenging part with any installation, so beware! Remove the motherboard from the packaging and place it on the box (careful not to put it on the anti-static bag, as the bag conducts electricity). Take off the cover from the processor slot- it should snap right off once you unhook the metal hinges.
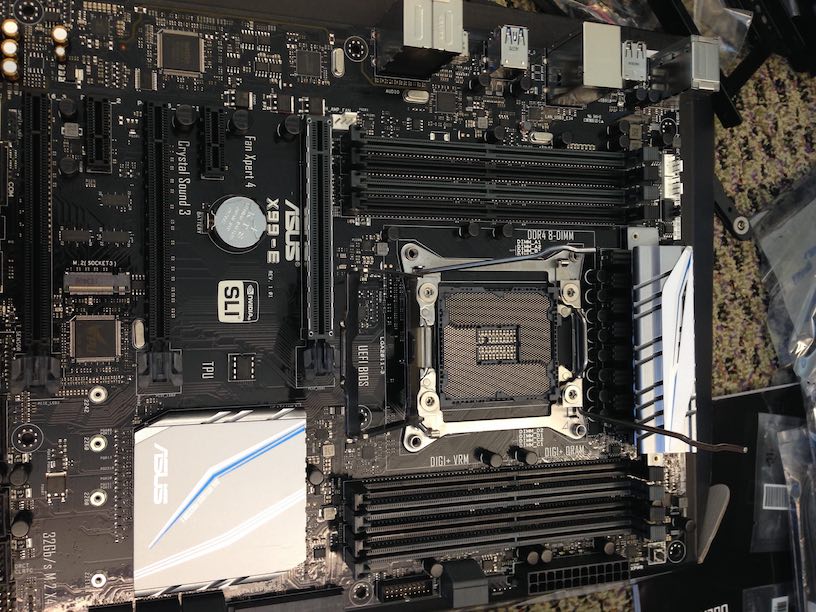
Then, install the CPU. There's only one way it can go, so rotate it 180 degrees if it doesn't slide right in. Close the arms, and you're done!
Now, follow the instructions on the heatsink. Add the smaller pegs to the holes around the processor - don't do what I did and add the large pegs because you'll have to unscrew them later! Then, apply a drop of thermal paste on top of the processor, then place the heatsink over it. Place the X-shaped piece in the middle (careful of the orientation), then screw it in.
The seal should be pretty snug and you might have to push on the screws a little to get it in. Don't over tighten, though, because one of my screws broke and the end landed in the peg attached to the motherboard! Thankfully, I managed to deal with it by using a tiny black screw left over from a previous build, attached to a larger peg.
Next, you'll want to mount the motherboard. Screw in the standoffs which hold the motherboard over the metal horizontal sheet you removed. Add the cover in the back of the machine behind the USB ports, and then attach the SATA cables to the disk slots (right in front of the power supply). In the end, you'll get something like this:
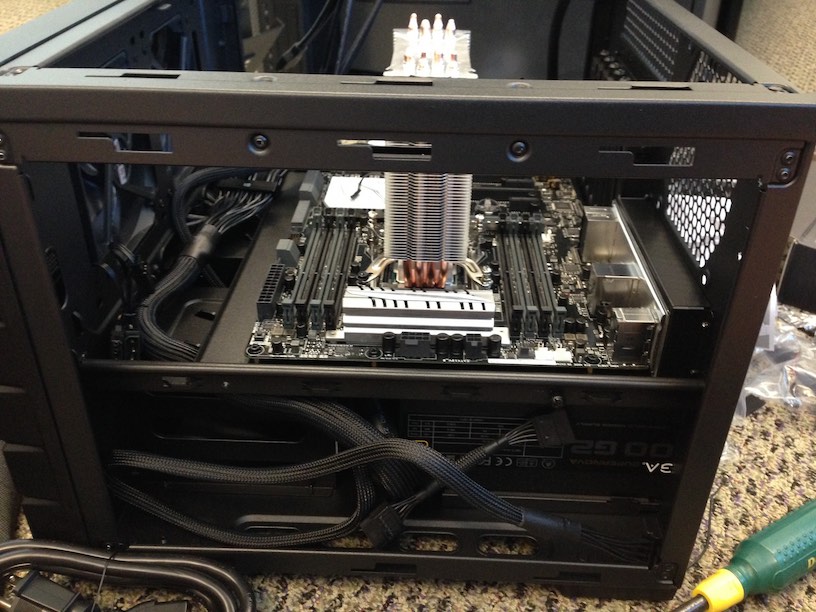
Next, you'll need to add the SSD, the RAM, and the CPU fan. Those should hopefully be pretty straightforward :)
The last step for setting up the motherboard is to plug in the power button / reset button / light cables that are attached to the motherboard (and what allow you to actually turn on the computer!). For me, these all were supposed to be hooked up to the front left corner of the motherboard.
4) Add the GPUs
The last step, hardware wise: add in the GPUs and attach the power cables that you already had from the power supply. That's it, and you should be good to go!
5) Install Ubuntu
We built the computer, so now we need to give it an OS! I chose Ubuntu 16.04. You'll want to use unetbootin to download Ubuntu onto a USB stick, and that should work for the install.
Whew! Hope this helps someone so that they make fewer mistakes than I did (on my second major build, no less.)